Pages

Showing posts with label equipment. Show all posts

Sunday 19 December 2021

Zero pinhole camera


Pinhole cameras have been with us for a long time in all sorts of shapes and sizes. Aristotle wrote about this naturally occurring in the fourth century. It was not until the 1850 s when the Scottish scientist Sir David Brewster used a pinhole camera to produce the first photograph. It has taken on many forms ever since!

Over recent years the pinhole camera has come to the fore as a desired method of producing a different style of photograph. This popularity has been helped by the zero image company, making some wonderfully crafted boxes for the pinhole photographer. They are not just great looking collectibles but are fully working cameras that take some excellent photographs. They come in the three main formats of 35 millimetres, 120 medium format and 5 x 4 large format.

This camera has not been an easy acquisition for me, with several false starts I have had to compromise to get a deluxe model but it is in my format of choice if not the camera I really wanted for the project. Having said that I am not disappointed with the multi format camera. On hindsight this could be a good thing, as it allows me to play with the different sizes that make up the 120 family at a later date.

So whats in the box apart from a well crafted wooden camera that some quarters think would make a good jewelry box. Thinking about it, I can see what they mean with the multi format version!

  • A plastic view finder marked out in the different 120 formats.
  • A very nicely presented instruction manual that needs to be read if you are serious about getting the most from your camera.
  • A grey cord? Not sure why this in the box.
  • A certificate telling you who hand crafted your camera.

There are some other bits of kit you need to gather before you stroll down the road with your camera.

  • You will not get far without a spare spool to wind the film on to.
  • A light meter unless you are going to use sun rule 16.
  • A cable release is a good idea if you have the deluxe version as it removes any chance of camera shake.
  • Tripod.
  • A note-book and pencil is a good idea for recording frame numbers and exposure times. That then can be checked against the negatives once they have been developed. Giving you an indication as to whether you are over or under exposing.

Sunday 26 January 2014

Angles of view with different lenses..

The diagram shows angle of view or angle of acceptance.

I have been looking back through my college notes and came across this series of pictures. I used the colour film you find in the pound/ budget shops. I have had no problems with the way the film has performed.


These pictures show how much of the view in front of the lens is depicted at the negative. As the focal length of the lens increases the angle of view reduces but the object size gets bigger. Therefore as you go up the focal range so the depth of field lessens.

View at 35mm

View at 50mm

View at 80mm

View at 135mm and the cold is getting to me.

View at 210mm

Saturday 7 July 2012

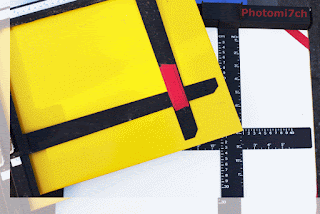
The masking frame


Also called an easel they come in different sizes. It is a good idea to pick one that is larger than your current needs therefore not limiting the proportions of your enlargements. The main reasons for using a masking frame are to hold the paper flat, to reconfigure the composition, allow the margins to be adjusted to the various format sizes you wish to use and to crop out some of those bits that creep in at edges, that you didn't see before you pressed the shutter. 

The frames come with two or four independently adjustable blades on a yellow or white base. I have noticed that some blades are not set at right angles to each other so it is a good idea to check them at various settings with a set square to make sure they are true. Also make sure that the edges of the blades are not bevelled under. This will reflect the light and produce a thin black line around the edge of the picture. It can be a nice affect but one you should have control over. The light colour of the baseboard is so you can see the projected negative, enabling you to frame the image before you put the photo paper in place.

When using single weight papers on a white baseboard, it is possible for the light to pass through the paper and be reflected back, changing the value of the exposure. You can stop this by laying a dark coloured card on the baseboard with the light sensitive paper on top.

The most versatile of the masking frames is the four blade, it allows you to mask the image by only having to move the blades of the frame without having to re-a line the whole easel each time. It also gives better control over how big or small you make the margins and in some cases gives you the ability to produce borderless prints. The versatility of these frames makes them quite expensive to purchase.

Saturday 23 June 2012

The Focus finder.


This is a wonderfully simple piece of darkroom equipment. Basicly it is a magnifying glass and mirror. It provides the user with the optimum sharpness for the enlargement by focusing on the grain of the negative. 

Also known as a grain magnifier it rests on the masking frame where it diverts a small amount of light from the projected negative to your eye as you look through the small magnifying lens. With one hand on the focusing control of the enlarger you gently turn the knob until the grain becomes sharp in the mirror. This translates to a sharp image at easel level; to maintain this accuracy a piece of waste photographic paper should be placed in the masking frame with the magnifier on top. It is easiest to focus on the grain with the enlarging lens set at its widest aperture and then re-checked at the working aperture. To make sure that the focus has not changed. 


Some focus finders can only be used in the central area of the projected image. This is because the angle of the light is more severe at the edges and corners. If you wish to check these areas to make sure that the whole negative is in focus you will need a magnifier that allows for this with a wider mirror and tilting aim.

Saturday 9 June 2012

Light meter.


The weather has been great this past week and not one to pass up such a rare opportunity I have moved my office to the end of the garden where it is shaded  by some silver birch trees. If it was not for the shade I would not be able to see the computer screen.


As you know from previous posts I have become quite smitten with my Zero 6x9 deluxe camera. It's lack of through the lens metering! Your right no lens, I have had to revert to using a hand held one. NO! I'm not going to take another camera with TTL with me. Why load myself down, believe it or not even with a tripod it is lighter than my standard kit. Besides I don't need the light readings to be that spot on especially when needing to account for reciprocity.


While writing this I'm joined by a baby starling. It looks like the one I saved from the jaws of the cat the other day. The bird seems happy for me to be here as he/she walks up to and around the chair I'm sitting in looking for local delicacies. It appears I'm the last thing it needs to worry about.


Two types of hand held light meter
I have two types of meter to choose from they are tried and trusted run of the mill units. The oldest one uses a selenium cell which is a type of photovoltaic / solar cell. When the front of the meter is exposed to the light it produces a small current which moves a needle that indicates how much light there is. This type of meter is batteryless but one of the down sides is in low light situation it requires a certain light level to read accurately.


The other light meter is a CdS unit or Cadmium Sulfide cell that has a greater low light sensitivity. This light meter works by regulating the energy in the battery rather than producing a current as in the former. With this type of meter it can suffer from drifting this is where the meter has been shown a bright light temporarily making it blind. The cell has a memory and can fool you into thinking the level of light has not changed. It is a good idea to let the meter read the scene for several seconds to make sure it has read it properly.


Note the starling casting a
critical eye over the
photographs.
Todays meters do not suffer from this they use silicon blue or gallium arsenide photocell coupled to a memory chip  so are unlikely to have a time lag in changing light conditions.

My light meters are general purpose, they read reflective light from a fairly large area of the subject which is about 30 degrees. They round this reading to an average of 18% ( a mid grey) no matter how dark or bright the scene is. This is where the zone system ( See Ansel Adams The Negative for more info) comes into its own or a system of your own to allow for it. I have my own method that works well with a little bit of intuition thrown in. Well! Most of the time.

Since writing this my CdS light meter has passed away. It will be missed.

Wednesday 14 March 2012

Dust, dust and more dust.


Dust! Don't you just love the way it manages to settle on to your equipment just as you make that all important exposure? The more you fiddle about picking every speck off, those bits 'standing in the wings' charge in at increasing speed  towards  your lens, negative and light sensor; so begins a  never ending battle fought everyday over the same territory! Should someone   come up  with a device that will send those particles packing you'll feel your prayers have been answered.
 

Welcome the Zerostat gun! one shot and those pesky particles are de-charged and falling from your lens etc. But come on! Can this really be true? Well No! after a few days of using this device I discovered that it attracted more dust than ever before! It was a nice idea while it lasted. Needless to say that this pistol has been consigned to history.


Really the only way to keep these little white specks from appearing on your final pictures is to be methodical in your approach. Checking your camera, lenses and enlarger regularly. But before you start this process it is a good idea to de-charge yourself by touching something that is earthed this will take the static out of your body and stop to some extent the static building up in the item you are trying to de-dust. Whatever you do don't use a cloth to clean your film strip, the static this induces will attract every bit of hair and dust in the universe turning it into a hair ball. If this happens its time to find another negative to print. I find that a puffer brush and a Kinetronice antistatic whisk brush work the best- in most cases removing the particle/s and hair in one go without a lot of fuss. Less fuss means more pictures printed with less spotting once the photograph is dry.
 

Remember never touch the bristle of your brush with bare fingers this will transfer microscopic particles of grease which will then be deposited to whatever you are trying to clear, making the job more difficult and in the case of old lenses will attack the coating.


Sunday 29 January 2012

Choosing an enlarger.


This is the most important tool in the darkroom after the enlarging lens. With this in mind you need to consider the following: 

1.   The number of negative sizes you may wish to print. It is a good idea to get a multi format enlarger even if you are only going to use 35mm.
2.   The most appropriate lens size and quality.
3.   What type of negative illumination. Diffuser or Condenser.
4.   The maximum size of print you are likely to make.
5.   Whether you may want to do colour at a later date. Colour headed enlargers can be used with multigrade papers. 

As mentioned in “3” the type of negative illumination you choose is worth  a lot of consideration -  there are positive and negative points to both. Here are some of the pros and cons: 

Diffuser enlarger: 
Diffuser light box
This type of enlarger design is used with colour and multigrade heads. The light travels through a mixing box and semitransparent screen above the negative. To counteract the drop off in light, these enlargers use a powerful quartz-iodide bulb.  This multi directional light passes through the negative and down to the paper. The affect of this will produce a gentler, softer quality to the  light, producing a less contrasty grade for grade photograph. As a result damaged and flawed negatives lose or soften some of their faults. 
There are tonal differences between diffuser and condenser produced photographs because of the way light passes around the silver particle's. This is negated when using Chromogenic monochrome and colour films as they rely on dyes to capture the light. 
Condenser enlarger: 

Condenser light box
Uses a plano-convex lens which spreads a bright hard illumination  evenly across the negative. Supplied from a opal tungsten lamp. The harshness of this light produces a contrast enhancement that appears to make  fine detail more exaggerated. This crisp appearance to the photograph has the negative affect of bringing into sharp focus the grain, any scratches, flaws and dust from the negative, meaning more time spent on retouching. These enlargers are subject to the Callier affect this is where the highlights in the negative scatter the light more than the shadow areas creating the increase  in contrast.


Saturday 7 January 2012

Luxuary Darkroom.


Some more kit for those with a bit more space and money.

  1. Enlarger with auto focus, tilting base and better lens.
  2. Enlarging easel 30 x 40 cm (12"x16") with four blades.
  3. Wall mounted safe lights and one white light.
  4. Automatic darkroom timer.
  5. Two timers one for developer and another for fix.
  6. Dishes 30 x 40 cm (12"x 16") and or slot processor.
  7. 50 ml measure.
  8. Four heaters with built-in thermostats for dishes.
  9. Four thermometers, alcohol.
  10. Double sided glazier with thermostat.
  11. Electric print dryer.
  12. Roller squeegee.
  13. Printing paper FB.
  14. Vacuum mount press.
  15. Film drying cabinet.
  16. Paper washer.

This is not a definitive list.

Monday 2 January 2012

Photographys. Bigger again?


To make enlargements over 50 x 60 centimeters requires a different working practice and a large darkroom.

If your negatives allow you to print them at 50 x 60 centimeters this is not the end of the story, you can go bigger with roll sized paper of 65, 100 and even 130 centimeters wide. But to go larger you will need a different method to produce them and a larger negative to start with which will increase the quality of the image projected by the enlarger. Your darkroom will need to be big enough to cope with the increased size of equipment. You will need an area of clear space that the enlarger can project the image onto whether it is the floor or a wall. Of the former the latter is the better way of doing things as you are less likely to get dust on the paper, it also makes it easier to dodge and burn if you need to.

Thursday 29 December 2011

Printing. Basic amount of kit.


The minimum amount of kit you need to produce a photographic print.

  1. Enlarger with red filter and filter head (colour) or multi grade head. Without filter head separate multi grade filters. Enlarging lens.
  2. Enlarging frame 18 cm x 24 cm (7"x 9") two-blade.
  3. Orange/red safe light and ordinary light.
  4. Four dishes minimum size 18 cm x 24 (7"x 9").
  5. Three pairs of tongs, one each for developer,stop-bath and fix.
  6. Three funnels of different colours or marked dev'. stop and fix.
  7. A measuring jug of a 1000mls.
  8. At least three storage bottles for your chemicals.
  9. Timer with alarm or timer.
  10. Thermometer alcohol type times three but you can get away with one.
  11. Puffer brush.
  12. Multi grade paper.
  13. Paper cutter.
  14. Focusing device.


Monday 19 December 2011

Dust in the darkroom.


If you look at a beam of light whether projected from your enlarger's negative carrier or a shaft of light shinning across a room you will notice lots of particals floating in the air. Dust over the course of time will settle on the upper surface's of your enlarger and lens.

It does not take long for a considerable amount of dust to build up on the surface of your lens greatly reducing the brilliance of light passing through it. You should make it a rule that once or twice a year you clean the lens thoughly. It is also a good idea to cover the enlarger at the end of each session with its cover if it has one or a black plastic bag this will greatly reduce the dust build up.

If you have a window in your darkroom that needs to be blacked out it is not a good idea to use curtains as these are dust traps. You are better off using a wooden shutter made of hard board painted matt black or a roller blind made of light tight material that has some way of being sealed along the sides.

What you have on the floor is also important. If it is carpet it needs to be removed, as this is a dust trap too. It should be an easy clean material like lino if you have floor boards or garage floor paint for concrete floors these keep the dust at bay making it easy to mop the floor with water, it also means that you do not have to vacuum very often leaving more time to print.

Sunday 11 December 2011

The Thermometer.


This is one of the most important pieces of kit in the darkroom. As already mentioned temperature is one of the main controlling factors in the processing of your films and prints. It is important that you have good quality thermometers that are graduated to at least half a degree but a quarter of a degree is better and one that has a thicker line at the vital 20 degrees C. It is a good idea to have a thermometer for each of the chemicals you use in the processing of your films and prints as it will stop cross contamination.Also there will be no hold ups if you break one. It is recommended that you keep to one type, preferably alcohol as it is safer than mercury. If a mercury thermometer breaks it will contaminate the chemicals it comes into contact with and fog any prints that are being processed at the time.

Wednesday 23 November 2011

Types of Enlarger Negative carriers


There are two main types of negative carrier, with and without glass. There are arguments for and against each type. Lets be honest there are three types, the adjustable.

Glass-less carriers avoid the Newton rings effect (a post for a later date) but also have the disadvantage of allowing the negative to buckle when they warm up, this is more pronounced with 6x6 negatives. To minimize this you should be very careful when focusing and use a smaller aperture to increase the sharpness across the negative.

Another disadvantage of a glass carrier is dust; to be honest it is not the big deal that everyone makes it out to be. It is just a case of being methodical in your approach. The main advantage of glass carriers is that they keep the negative flat. Another plus is that you can experiment with unusual effects by using various materials such as flower petals, salt crystals and soap suds etc in the carrier.


There are adjustable carriers also, which are very handy as they allow you to mask out badly illuminated edges without having to increase the magnification, or you can adjust them to include the rebate of the negative.

Enlarging Lenses


Enlarging lens mounted in lens saver.
When choosing your enlarging lens you should choose one that reflects the quality of the lenses you use on your camera. If you do not, that quality will not transfer to the final print. Of course there are other factors in play when making these decisions namely your own financial position; it maybe better to wait a little longer and purchase what you need instead of what fits your pocket at the time.

I cannot repeat this often enough that high quality camera lenses need high quality enlarging lenses, likewise reasonable quality camera lenses need reasonable quality enlarging lens. In other words like for like.

Friday 11 November 2011

Dry side of the darkroom.


Typical layout for dry side of darkroom
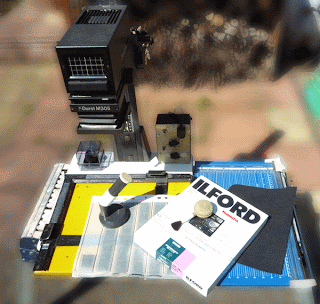
This is the area where you will have your enlarger set up. The table will need to be large enough to allow for timer, puffer (like a rocket air) and magnifying glass. There will also need to be space for you to lay out your negatives, printing paper, scissors and or guillotine/rotary trimmer and holding back and burning in tools. It is a good idea if this area also has cupboards and draws for keeping your paper and equipment in.