Pages

Showing posts with label enlarger. Show all posts

Friday 12 January 2018

Newton's rings. Updated


This effect can happen when using medium format and larger negative carriers as they use glass to keep the negative flat. Most carriers today use a frosted piece of glass above the negative known as anti Newton glass. 
The rings occur in the areas where two clear smooth flat pieces of glass lie next to each other but do not quite touch. The interference happens because the light rays are refracted, this produces irregular shaped dark rings in the projected image. This will happen more readily if any of the surfaces are wet. You can get round this by using a paper mask with the negative in the carrier. This will block out the light in the places where there is a gap between the glass surfaces. You will need to check the projected image to see if they are still visible.

Sunday 26 March 2017

Enlarging lens revisited

Recently black and white photography magazine has been celebrating it's two hundredth edition which gave me impetus to rediscover what was in some of those back issues. While thumbing through one issue, an article about enlarging lenses caught my eye, reminding me that I have been meaning to revisit the subject.

I have written a couple of small articles: Enlarging lens and which aperture  I re-read both before writing this one so as not to repeat myself. But that is not going to be easy as the main issue with enlarging lenses is quality. The rule of thumb is to choose a lens of six or more elements. The Componon-s and Rodagon are two modern designs that work very well - they are two quality makes of the few still available new.

Looking down a focus finder at F5.6- F8
In the 1970s Nikon special optics division set about producing a darkroom lens second to none ( Apo-EL-Nikkors ). It was done in a one off batch, releasing a number to the market over a ten year period until they were all gone. It has been said that at the end of this period they did consider doing another run but stopped doing so because they would have had to sell the lenses for £12,000 each. I do not know if this figure is true or not. If it is, it will have made the original runs price in the thousands and therefore out of the reach for most of us.

The enlarging lens has one job to do and that is to project the the image from the negative to the paper perfectly. The one hindrance to good enlargement method and creativity is poorly maintained or ignorantly used enlarging lens practice. It is not good enough to think if you close the lens right down, like you would a camera lens, that you will increase the sharpness of the image. The rule again is to close the lens down by two F numbers. In a lot of cases this produces the optimum sharpness. One stop more may result in a softening of the grain structure. This does not mean that you will notice a softening of sharpness with the mark one eye ball as the image is projected onto the paper. Like a lot of things in photography the kit is made to a greater quality than can be seen in normal life.

Focus finder
Enlarging lenses should not be treated as second class citizens as they are several time better in quality than the camera mounted counterparts. They do their best work in a very narrow range of magnifications. For 35mm negatives the lens is optimized to 10x its size which equates to an enlargement of 10x8. As you go up the format scale this decreases 6x6cm lenses 6x and 5x4in 4x magnification. As you push past the optimal point it increases the possibility's of grainy photographs. This is not to say you should not push beyond this point as experience has shown. You can negate this by using ultrafine film developers.

Grain at f11

How do you see which is the best apertures to use? You need to complement your lens with a good focus finder. This magnifies the grain of the negative so you can see it. The best way to use the finder is to have the enlarging lens fully open. Place the finder in the middle of the baseboard. While looking down it at the grain, adjusting the bellows until it separates into little defined specks. This will mean that you now have fine focus.

While still looking down the finder shut the lens down a stop at a time. There will be a point where the look of the grain go's slightly soft and becomes softer the more you close it down. You should remember that you are still at optimum focus. To test this you can try to adjust the sharpness in most cases it will get worse and become to difficult to regain any sharpness until you go back to the optimum aperture.

Grain at F16 looking down the focus finder.

What has been described above is my experience with one of my 35mm enlarging lens. I will point out that it is not a well known make. It is one I use often. The softening of the grain in the focus finder is not transferred to a softer looking image on the baseboard that can be detected with the naked eye but you will start to question whether it is affecting the quality of your images. The only way you will know is to borrow or buy a better quality lens and do a comparison.

When considering buying a lens you should spend as much as possible to ensure that you get a good to very good lens. Knowledge that the lens is not what you expected will impact on your photography subconsciously.  

Sunday 19 October 2014

The Monochrome print and the colour enlarger.

Many years ago I was in a position to purchase a medium format film camera. This led to a complication in the darkroom in that my then current enlarger was for only 35mm film. An extra expense I had not budgeted for! At that time multigrade headed enlargers were quite expensive second hand and a bit thin on the ground. By chance 'the other half' noticed an ad in the local paper, it was for a medium format colour enlarger that came with some other bits to do with colour printing. I had not considered that a colour enlarger maybe just as good. The person I spoke to did not know what size negatives it took. So going to have a look was a gamble but then I only had to go round the corner. To my surprise it was all in mint condition and the enlarger would deal with negative sizes up to 6 x 7 - I was hooked! Apparently the seller had only used it a few times and decided to go digital. We struck a deal and the rest as they say is history.

Once the enlarger was home I dismantled it and gave it a good clean and checked it was all in good working order, not that I expected to find a problem. The big surprise was how dusty the inside was. It was gently cleaned with a soft damp cloth and wiped dry so as not to leave any residue marks. 


The next thing I needed to know was how to set the filters values for use with black and white multigrade papers. I chatted to a friend who pointed me in the right direction. After a bit of digging in the library I came up with a number of values for different makes of enlarger my one included. I thought the values should all be the same. But have discovered that the values are a suggested starting 
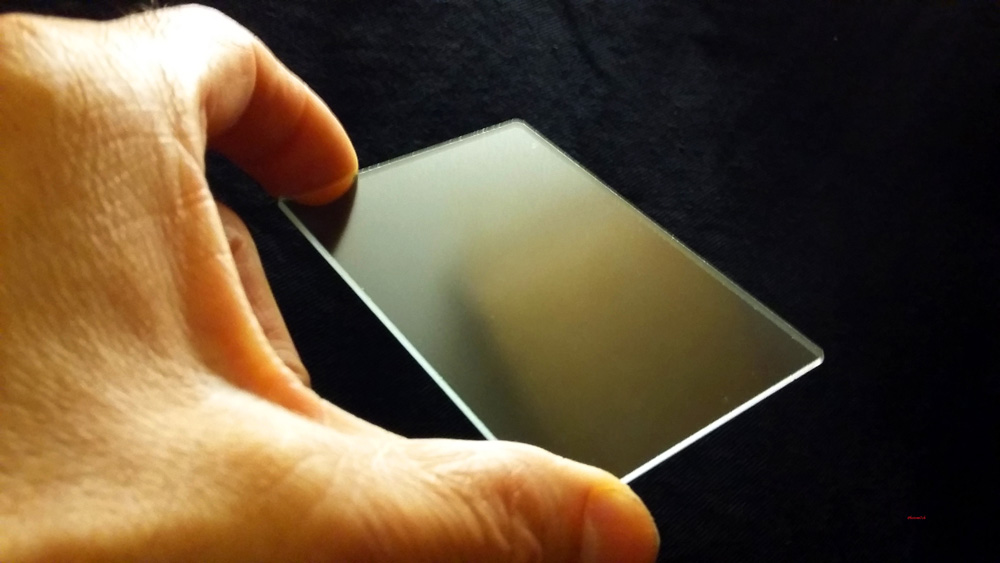
point. I have a set of multigrade filters that I used with my other enlarger at least now I will not have to check them for dust.

 There is a lot of speculation on the subject of using colour enlargers with multigrade papers. They split into two camps - the purists that say the multigrade filters only give the papers true contrast and people like me who check things out for themselves. I am at an advantage in that I have used both methods. Personally I have not noticed a difference but then I have not done a like for like comparison. Would I do one? The only way I can answer this is to say If I was to become dissatisfied with my results I may check to see if there was a difference.
 
The following are the values for Variable contrast papers for different makes of enlarger. The values are for the yellow and magenta filters the Cyan should be set to zero at all times.

Ilford settings

1
2
3
4
Grade
Y
M
Y
M
Y
M
Y
M
0
150
25
92
16
75
12
110
16
0.5
110
33
74
22
55
16
73
22
1
85
42
56
28
42
21
57
28
1.5
70
55
46
37
35
27
46
36
2
55
70
36
46
27
35
36
46
2.5
42
80
28
53
21
40
28
53
3
30
90
26
60
15
45
20
60
3.5
18
112
12
75
9
56
12
74
4
6
135
4
90
3
67
4
90
4.5
0
195
0
130
0
97
0
130
5
0
200
0
130
0
97
0
130

The numbered columns represent different makes of enlarger
  1. Dunco, Devere, Chomega, Beseler, Jobo, Kaiser, Omega, Paterson, LPL,Kodak.
  2. Durst.
  3. Meopta
  4. Leitz
  5. kodak
  6. Durst

Kodak
Grade
5
6

Y
M
Y
M
0
130
0
130
0
1
75
10
65
15
2
50
20
40
35
3
30
35
20
60
4
10
100
10
100
5
0
200
0
180

It has been many many years since I obtained my enlarger and the resulting prints I have produced with it I have been pleased with, so much so that I have not tested the accuracy of the enlargers filters with Ilfords set. If it ain’t broke why try to fix it!
Since writing this ilford have introduced multigrade five making the above tables relevant to multigrade 4 only.  when purchasing paper you should always check the manufactures tables that come with the paper for the latest filter values.


Print 1
Print 2
Print 4
Print 5


Technical data:


  1. 35mm film, Agfa apx, iso 100, developed in ID11, Printed on Ilford multigrade RC gloss. developed in multigrade.
  2. 120 format FP4+ iso 125  , 6x6 negative, developed in ID11,  Printed on Ilford multigrade RC gloss. developed in multigrade
  3.  120 format FP4+ iso 125, 6x6 neg, developed in ID11, Printed on Ilford multigrade RC gloss. developed in multigrade.
  4. 120 format fomapan 100, iso 100, 6x6 neg, ID11, Printed on Ilford FB gloss natural tone, developed in multigrade.


Saturday 5 May 2012

Light striped prints


Another printing fault is light pollution known as fog. This is assuming it hasn't happened in the camera.


The dark line you see running up this picture
 it the result of light
getting to the light sensitive material. Fogging .

         It Could be where stray light from a darkroom not properly blacked out has found its way to the light sensitive side of the the paper you're using.

         Your safe light is too close to the enlarger and or the wrong colour.

         It can also happen if your enlarger leaks light when being used.

         Badly stored and out of date paper can also be fogged.

The causes of these faults, also point to ways of curing them. This post suggests a way of detecting light induced fog.

Saturday 25 February 2012

Focusing. Soft prints why!


Ilford FP4+, Iso 125, developed in ID11
Printed on Ilford paper
There are reasons for your photographs to be out of focus. If we assume that the negative was sharp when it was exposed, it could be if you are using a glassless negative carrier that the negative may have popped and requires refocusing. Another cause is vibration, you need to make sure that you are not knocking the enlarger when you are exposing. If the enlarger is mounted on an uneven surface or rickety table this will not help nor will living near a main road with lots of heavy traffic.
If when looking at the photograph it looks  blurred, it has not been focused properly. You can cure this by using a focusing negative. To make one you need a negative of no value as you will have to scratch the emulsion in several places. It is simply a case of placing this negative in the enlarger and focusing until the scratches are razor sharp. Alternatively you can use a special focuser.

Monday 20 February 2012

Deliberate distortion.

The enlarger is not there just to correct distortion but to add it as a compositional tool, in some cases to comic effect. The most obvious way of producing this is to bend the paper by clamping it between two blocks in a convex or concave shape. Double curves are possible. Remember the effect  aperture has on the depth of field and allow for it by using a larger F number to compensate and don't lose sight of the fact you will need to use dodgers to adjust the relative exposure.
This is Johnny from Fifth gear doing his piece to camera
about the re-launch of the Larda 4x4.

Agfa APX, iso 100, developed in PMK Pyro,
printed on Ilford paper 

Wednesday 15 February 2012

Schaimpflug's rule.


This is the rule on tilting the easel and carries on from my last post.  The most accurate way of correcting distortion is to use Scheimpflug's principle: This states that you should tilt the negative as well as the baseboard and that they need to be canted over in opposite directions to each other. Additionally the incline should be such that the plane of the negative and the plane of the baseboard should meet in the plane of the aperture to give maximum sharpness over the whole image. 

You will find that the more expensive enlargers allow the plane of the negative to be tilted, add a tilting easel to the mix and the results produced can be remarkable.

Related posts:

Tilting the easel.

Sunday 29 January 2012

Choosing an enlarger.


This is the most important tool in the darkroom after the enlarging lens. With this in mind you need to consider the following: 

1.   The number of negative sizes you may wish to print. It is a good idea to get a multi format enlarger even if you are only going to use 35mm.
2.   The most appropriate lens size and quality.
3.   What type of negative illumination. Diffuser or Condenser.
4.   The maximum size of print you are likely to make.
5.   Whether you may want to do colour at a later date. Colour headed enlargers can be used with multigrade papers. 

As mentioned in “3” the type of negative illumination you choose is worth  a lot of consideration -  there are positive and negative points to both. Here are some of the pros and cons: 

Diffuser enlarger: 
Diffuser light box
This type of enlarger design is used with colour and multigrade heads. The light travels through a mixing box and semitransparent screen above the negative. To counteract the drop off in light, these enlargers use a powerful quartz-iodide bulb.  This multi directional light passes through the negative and down to the paper. The affect of this will produce a gentler, softer quality to the  light, producing a less contrasty grade for grade photograph. As a result damaged and flawed negatives lose or soften some of their faults. 
There are tonal differences between diffuser and condenser produced photographs because of the way light passes around the silver particle's. This is negated when using Chromogenic monochrome and colour films as they rely on dyes to capture the light. 
Condenser enlarger: 

Condenser light box
Uses a plano-convex lens which spreads a bright hard illumination  evenly across the negative. Supplied from a opal tungsten lamp. The harshness of this light produces a contrast enhancement that appears to make  fine detail more exaggerated. This crisp appearance to the photograph has the negative affect of bringing into sharp focus the grain, any scratches, flaws and dust from the negative, meaning more time spent on retouching. These enlargers are subject to the Callier affect this is where the highlights in the negative scatter the light more than the shadow areas creating the increase  in contrast.


Friday 27 January 2012

Enlarging len which aperture?


The quality of your enlarging lens will lead to better and sharper results at greater magnification. The aperture ( low number = large opening, high number = small opening) you set not only affects the amount of light it lets through but the depth of field as well. A good average aperture is F/5.6 in most cases. If the exposure times are to short a larger F number is needed, this will give you a chance to hold back shadow areas that may become to dark to show any detail. But don't get carried away and close down the lens by too  many F numbers as this may over heat the negative causing it to buckle, making the picture loose sharpness.

Saturday 31 December 2011

Magnification on your enlarger


This is going to get a bit technical, so bear with me! This is the ratio between the print and the negative. It is calculated using the linear rule. To make things easy, lets say we are going to enlarge a thirty-five mm negative (24 x 36 mm) by a factor of ten this will give us a print size of 240 x 360 millimeters ( about 9" x 14") in size.
Magnification is related to the distance the negative is from the enlarging lens and the lens from the baseboard. So as the latter distance increases the former decreases. In other words the higher the enlarging head is from the baseboard the closer the lens gets to the negative when it is being focused and vice versa. It stands to reason that the larger the print the longer the exposure time will need to be. There will also need to be a change in paper grade to a harder one as there is a softening in the contrast.

Thursday 29 December 2011

Printing. Basic amount of kit.


The minimum amount of kit you need to produce a photographic print.

  1. Enlarger with red filter and filter head (colour) or multi grade head. Without filter head separate multi grade filters. Enlarging lens.
  2. Enlarging frame 18 cm x 24 cm (7"x 9") two-blade.
  3. Orange/red safe light and ordinary light.
  4. Four dishes minimum size 18 cm x 24 (7"x 9").
  5. Three pairs of tongs, one each for developer,stop-bath and fix.
  6. Three funnels of different colours or marked dev'. stop and fix.
  7. A measuring jug of a 1000mls.
  8. At least three storage bottles for your chemicals.
  9. Timer with alarm or timer.
  10. Thermometer alcohol type times three but you can get away with one.
  11. Puffer brush.
  12. Multi grade paper.
  13. Paper cutter.
  14. Focusing device.


Monday 19 December 2011

Dust in the darkroom.


If you look at a beam of light whether projected from your enlarger's negative carrier or a shaft of light shinning across a room you will notice lots of particals floating in the air. Dust over the course of time will settle on the upper surface's of your enlarger and lens.

It does not take long for a considerable amount of dust to build up on the surface of your lens greatly reducing the brilliance of light passing through it. You should make it a rule that once or twice a year you clean the lens thoughly. It is also a good idea to cover the enlarger at the end of each session with its cover if it has one or a black plastic bag this will greatly reduce the dust build up.

If you have a window in your darkroom that needs to be blacked out it is not a good idea to use curtains as these are dust traps. You are better off using a wooden shutter made of hard board painted matt black or a roller blind made of light tight material that has some way of being sealed along the sides.

What you have on the floor is also important. If it is carpet it needs to be removed, as this is a dust trap too. It should be an easy clean material like lino if you have floor boards or garage floor paint for concrete floors these keep the dust at bay making it easy to mop the floor with water, it also means that you do not have to vacuum very often leaving more time to print.

Wednesday 23 November 2011

Types of Enlarger Negative carriers


There are two main types of negative carrier, with and without glass. There are arguments for and against each type. Lets be honest there are three types, the adjustable.

Glass-less carriers avoid the Newton rings effect (a post for a later date) but also have the disadvantage of allowing the negative to buckle when they warm up, this is more pronounced with 6x6 negatives. To minimize this you should be very careful when focusing and use a smaller aperture to increase the sharpness across the negative.

Another disadvantage of a glass carrier is dust; to be honest it is not the big deal that everyone makes it out to be. It is just a case of being methodical in your approach. The main advantage of glass carriers is that they keep the negative flat. Another plus is that you can experiment with unusual effects by using various materials such as flower petals, salt crystals and soap suds etc in the carrier.


There are adjustable carriers also, which are very handy as they allow you to mask out badly illuminated edges without having to increase the magnification, or you can adjust them to include the rebate of the negative.

Enlarging Lenses


Enlarging lens mounted in lens saver.
When choosing your enlarging lens you should choose one that reflects the quality of the lenses you use on your camera. If you do not, that quality will not transfer to the final print. Of course there are other factors in play when making these decisions namely your own financial position; it maybe better to wait a little longer and purchase what you need instead of what fits your pocket at the time.

I cannot repeat this often enough that high quality camera lenses need high quality enlarging lenses, likewise reasonable quality camera lenses need reasonable quality enlarging lens. In other words like for like.

Enlarger


An enlarger consists of:

Enlarger for 35mmm negs
only. with out multigrade
head. Condenser type.

A baseboard on which enlargements are made; a column, which serves as a slide for the support arm, that holds the enlarging head, which consists of the lamp housing that contains the bulb; a single or double condenser; negative carrier, a place to fix the lens; a means of focusing and lastly a red filter that swings in front of the lens.

The lamp contained in the light housing is of the opal type and has a power output of 75, 100 or 150 watts. The pearlescents of the bulb with the help of a condenser distributes the light evenly across the negative. The lens focuses and projects the negative image on to the baseboard or rather an easel with paper on it. The higher the enlarging head is from the baseboard the closer the lens is to the negative the greater the magnification. The closer the head is to the baseboard the greater the distance the negative is from the lens the smaller the magnification of the picture. The typical focal length of lens for 35mm negative is 50mm and for a medium format (6x6) is about 75mm.
A multi format Enlarger with multi grade head.
Diffuser type.

The negative is clamped in the carrier which incorporates a mask that is the same size or format as the film and then placed in the light box. It is not a good idea to cut the negatives into single frames, it is better to leave them in strips to make it easier to line the frame up with the mask in the carrier, this also means you are less likely to scratched them.


Focusing is usually done manually, although there are enlargers available with automatic focus, these are usually more expensive.

Friday 11 November 2011

Dry side of the darkroom.


Typical layout for dry side of darkroom
This is the area where you will have your enlarger set up. The table will need to be large enough to allow for timer, puffer (like a rocket air) and magnifying glass. There will also need to be space for you to lay out your negatives, printing paper, scissors and or guillotine/rotary trimmer and holding back and burning in tools. It is a good idea if this area also has cupboards and draws for keeping your paper and equipment in.