Pages

Showing posts with label camera. Show all posts

Saturday 29 April 2023

Street Photography part 3


It was a wise decision to use the look down viewfinder. It has aloud me
to make some extreme angle and candid images without to much fuss. If
someone catches my eye after making an image of them I always offer a card
so they can get in touch if they would like a copy of the image.

You get some looks when people suddenly realized that you may have included
them in a picture and or have a camera in your hand. You become a demon
that needs a scowl to keep you at bay so they can carry on their way with
there soul intact . I'm pleased to say there are others only to happy to chat.
But here is the rub I do not always print my images to include all the detail and
therefore they may only be a shadow.


I have found that the longevety of a project can be dependent on the kit you
use. Which bring me onto the camera system this can help or hinder the
possiblities in some cases. I know some people think I'm cracked to be lugging
a round a Bronica SQAi and that it is film based. You have to remember that it
is a pro set up meaning by changing the viewfinder I have a new angle of view
and therefore a different composition with the same lens, film combination. By
doing this it keeps the possibilities fresh. Likewise a change of lens would do
the same along with a change of film format from 120 to say 35mm.


The Bronicas look down viewfinder shows the picture back to front where left is
right, right is left. This can change the look of the compostion making it or
bracking it. It can also be frustrating when it comes to deal with a fast moving
street scene. This is where familatery with the way the camera works comes
into play.


 There are no rules to street photograph you do not have to use the same kit all
the time as hinted at above it is good to mix it up by doing so it keeps it fresh.
Oh! And Keep an open mind.


 Time moves on and so do I with camera in hand scouting for the next picture.


Techinal Data:

Monochrome images scanned from prints using flat bed scanner.  Ilford multigrade RC paper.

Pictures and article are the copyright of Mitch Fusco 2023.

Here are links to Preivious posts  on Street photography project if you have missed them.

Street part 2 

Street part 1 


Monday 20 December 2021

Preparing the Zero Pinhole Camera for use.


Using this camera is a real step back in time requiring you to put aside all those luxuries that the modern photographer has taken for granted. After all, it is just a box with a pinhole in it, the ultimate manual experience from loading the film and remembering to wind it on, to calculating the shutter speed.


Loading the film:

To start with you need to load a roll of film. That's obvious, most film cameras need film to work. If you are like me it has been a long time since you looked at the backing paper of a roll 120 film. I had forgotten that it is marked for the four different sizes in the 120 family and with the multi format camera it has three red coloured windows in which to view the film numbers. It also has a set of symbols that tell you when the number is about to appear in the window which also marks the middle of the frame. With this set up you cannot blame anyone else for winding it on to far, so it is a good idea to take it slow and gentle in the beginning. Before loading the film you need to set the format your going to use, once the back and top are in place, it is time to advance the film so the light-sensitive material is in front of the pinhole. When winding on you may notice that it becomes quite tight, this is where the celluloid attached to the backing paper is being drawn in front of the light box. Just continue gently on until the first frame number appears behind the little red window. Now the camera is primed for light capture.


Calculating exposure;

The Zero cameras aperture is set at F 235, it is important to remember this as this number is not written on the calculator attached to the back of the camera. The calculators outer ring shows shutter times from 8000 ths of a second too 15 hours, the inner ring shows F numbers from F 1.4 to F 500.


Please note that all the figures that follow are based on a film speed of 100 ISO.

Today, for example, my light meter is showing a light reading of F 5.6 @ 500 ths of a second. Now using the calculator move the dials so F5.6 is opposite 500 ths of a sec., then find F 235 on the outer ring and read off the time opposite which is about 3 second; you will need to make an adjustment for reciprocity effect by a factor of 2 making an exposure time of 6 seconds. I say 'about' because the next F number is 250 with an indicated shutter time of 4 seconds. To start with it is a bit hit and miss, that is why it is a good idea to make notes on shutter times so you can see where to make adjustments once the film has been developed.

You will need to make adjustments for the reciprocity effect as follows:

  • From 1 second and over compensate by multiplying by 2 giving an exposure of 2 seconds.
  • From 5 seconds and over compensate by multiplying by 5 giving an exposure of 25 seconds
  • From 50 seconds and over compensate by multiplying by 12 giving an exposure of 600 seconds/11 mins.


Sunday 19 December 2021

Zero pinhole camera


Pinhole cameras have been with us for a long time in all sorts of shapes and sizes. Aristotle wrote about this naturally occurring in the fourth century. It was not until the 1850 s when the Scottish scientist Sir David Brewster used a pinhole camera to produce the first photograph. It has taken on many forms ever since!

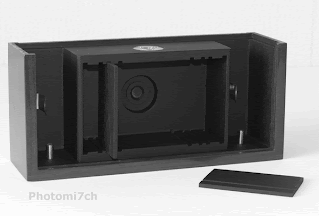
Over recent years the pinhole camera has come to the fore as a desired method of producing a different style of photograph. This popularity has been helped by the zero image company, making some wonderfully crafted boxes for the pinhole photographer. They are not just great looking collectibles but are fully working cameras that take some excellent photographs. They come in the three main formats of 35 millimetres, 120 medium format and 5 x 4 large format.

This camera has not been an easy acquisition for me, with several false starts I have had to compromise to get a deluxe model but it is in my format of choice if not the camera I really wanted for the project. Having said that I am not disappointed with the multi format camera. On hindsight this could be a good thing, as it allows me to play with the different sizes that make up the 120 family at a later date.

So whats in the box apart from a well crafted wooden camera that some quarters think would make a good jewelry box. Thinking about it, I can see what they mean with the multi format version!

  • A plastic view finder marked out in the different 120 formats.
  • A very nicely presented instruction manual that needs to be read if you are serious about getting the most from your camera.
  • A grey cord? Not sure why this in the box.
  • A certificate telling you who hand crafted your camera.

There are some other bits of kit you need to gather before you stroll down the road with your camera.

  • You will not get far without a spare spool to wind the film on to.
  • A light meter unless you are going to use sun rule 16.
  • A cable release is a good idea if you have the deluxe version as it removes any chance of camera shake.
  • Tripod.
  • A note-book and pencil is a good idea for recording frame numbers and exposure times. That then can be checked against the negatives once they have been developed. Giving you an indication as to whether you are over or under exposing.

Wednesday 8 December 2021

The Camera from Dresden part one.


This camera was almost an impulse buy, when I saw it in the window of a camera shop at a giveaway price. However, I did not have the cash on me. As I carried on walking down the street I thought it would be snapped up by some lucky individual embarking on a film camera odyssey.


At the time, I did not realize it would be me six weeks later. On inspecting the MTL 3, the body was in mint condition - not a single mark on it that I could see. However it did have some issues, the most obvious one being that it had no lens, the light meter did not work and the foam on the film door had perished. Shouldn’t be too difficult to put right, I thought.


When I got the Praktica home, I tried to remove the battery cover, but it was locked solid. I did not have time to go any further with it at that point and thought that I could always use a hand held meter. With that, I put the camera in the cupboard. 


Some weeks later I found myself going to the camera cupboard and picking up the Praktica. I had it in mind to get to the bottom of the stuck battery cover. I found a set of micro screwdrivers and undid the four screws that held the base plate on. I had no idea what I would find once the cover was removed. Fortunately, there were no springs that pinged out across the room when the base plate was lifted. I picked the battery housing off the base of the camera, only to be presented with a leaking battery - mystery solved.

Removing the aluminium battery cover from the metal insert was going to be a challenge. The battery had leaked into the threads, sticking the two parts together like super glue would. I don’t know what I was thinking when I squirted freeing oil on the thread and left it to sink in. I tried and failed to shift it using a fifty pence piece and a large adjustable spanner. There was no other course of action left to me but the brutality of fire and heat in a blow torch. I wondered if just heat would work?

As I walked across the room to the log stove, it was like walking into the sun. I left the battery housing on top of the log stove for five minutes or so and returned to the tropical room suitably dressed in shorts and, with heat resistant gloves, picked the battery cover off the stove. I placed the housing in the spanner and used the fifty pence piece in the cover and applied increasing amounts of pressure. With the sweat running down my face, it gave all of a sudden flicking the coin out of my fingers across the room. After I found the coin I placed it back in the slot and undid it as normal.

One issue down, three to go. The hunt was on to find a lens, battery and foam. I had forgotten what a waste of time looking for stuff on the net is. Some hours later, I had found a lens and battery (the modern number for it is LR9XP625G - the last three numbers are the most important). From the same place, I bought a Sigma 80-200 zoom lens. Thanks go to Bristol Cameras for their prompt and friendly service. The lens when it arrived was brand new and was the same price as the camera body.

I tracked down the foam to eBay and what a pain the seller was, to put it mildly. In the end I went down to a craft shop and picked up a sheet of foam for a pound - four times cheaper than the eBay seller!

With the light meter now working, the lens attached and the foam in place, it was time to load the camera with some film. I had an out of date roll of Fomapan 200, which is of a similar age to the camera, so that would do nicely.

Let the escapade begin.......It took a bit of time to get the film to wind on properly as I could now work out how the film lead picked up the wind on the cylinder. The sound and vibration from firing the shutter almost shocked it out of my hands. Must remember to grip it more firmly and use ear defenders.

To be fair, I had forgotten how basic the manufacture of this camera is and the sound of the shutter is quite reassuring. I don’t think I will be using it for candid street shots, but then again... It will take me a little time to get used to the way the camera is set up. It is a little chunky when making adjustments, but I will not let that put me off.

In case you missed part two here is the link part two


Tuesday 23 November 2021

Using the camera from Dresden part 2

The camera from Dresden has been a joy to use. A little quirky at first as my fingers got used to the placement of the controls. But, once mastered, it became intuitive when using the light meter and shutter. It is obvious that the controls lack the finesse of its Western counterparts, but that is part of its character.


CLICK! As the last frame on the Fomapan 200 is exposed - with this camera more than others I have used, you need to hold it correctly with your left hand supporting the body and lens, while the right grips the body and actuates the meter and shutter. With the camera turned upside down, I press the button that releases the wind on and slowly rewind the film back into the canister.

Now, to develop the film, it was always going to be HC 110 as it is the new kid in the darkroom. The more I use it, the better my understanding of what to expect from it with different film manufacturers.

The technical bit: Dilution 1:31 in 300 mls which equates to 9.7 mls of developer. The film was exposed at 200 ISO box speed, which means a time of 3 1/2 mins, but I extended it to 4. I also prolonged the fix time to 10 minutes after checking the film halfway through, as it still showed signs of fog. 


At first glance, the negatives appear to be on the thin side (under exposed). I think this is due to the built-in light meter. I noticed that if you held the meter on for more than a few seconds, the needle started to fall. I did, on occasion, allow for this - whether I should have or not, I’m not sure.

At the time of writing this, I still have not had the chance to contact print the negatives in the darkroom. This is the real test of how good your negatives are - this point being borne out by a new member of the FADU forum who has switched from scanning his negatives to processing them analogously and is having trouble getting his prints right. This illustrates just how much the scanning process compensates for the differences between the highlights and shadows.


I use the hybrid system myself (analogue to digital) and know it is far easier to get the results you want than in the darkroom, especially if there is a problem with density. But I prefer the wizardry of chemicals on paper to the click of a button on a screen.

Even though I’m not happy with the way these negatives look, I will still print some of them. As I print them, I consider the sense of disappointment I feel. Why should I be disappointed? The negatives are less than technically perfect, but what about creatively? In our pursuit of knowledge on the best way to produce our images, our minds become polluted with other people’s expectations of what constitutes a properly produced picture. Photography is, by its nature, technically based, but should we be sacrificing creativity for technical excellence? That’s my personal view, even though I am not for one minute suggesting sloppy workmanship.


My disappointment with these negatives is because they do not resemble what I have come to recognize as well exposed, but this should not be the whole story. When I started out with the MTL3, it was to be an adventure - some fun with out-of-date film. I, however, ignored the golden rule of not using old film that has been opened and partially used, which is asking for trouble. 

Taking into account all that has gone before, this film is a triumph in that there are images to be printed. In the old days I would have just filed these negatives, never to be seen again. Nowadays, I keep an open mind as to what may be possible. I am pleased that I did.


Technical data: 

All the black and white images were scanned from the contact print.


Tuesday 16 February 2021

Zero double take project first results.


Zero 6x9 pinhole camera.


As I sit here reviewing the first batch of photographs from double take, the wind and the rain is still lashing the property - something it has been doing for the last twenty four hours. I'm pleased to be inside in front of a warm fire with Tabatino who is stretched out in front of it like a rug. 


Zero 6x9 pinhole camera.


The contact print shows that the second exposures are quite weak and will require dodging and burning to make their presence felt. With this in mind I  have been using half page test strips  so I can see how much more exposure is needed to bring out the weaker parts of the negative. This has given me a better overall idea of how much extra time the weaker parts of the picture need so I can get as close as possible to what the final print will look like. Having  chosen to use 6x6 negatives I find myself cropping them to a landscape frame size giving me more choice over which parts of the negative make the final composition and partly to get the best use out of the paper size. I'm using Silverprint's gloss proof paper mainly because I believe it has added something to the overall expression of the photographs.


Zero 6 x 9 pinhole camera.


The results of this first film have been a pleasant surprise in that most of the negatives have produced picture combinations that work well. Whether this is down to luck or the pre-planning in the picture combinations only time will tell. The day I took the pictures was a challenge in that it was windy with a broken cloud sky that was fast moving making metering each shot difficult. By the time I had worked out the shutter speed and opened it the scene in some cases had gone from bright sunshine to dull and overcast or vice versa. It just goes to show how forgiving film is when it comes to exposing it in rapidly changing light conditions over extended periods. These were printed at grade 3 and not my more common split procedure.


Technical data: 

Film 120 FP4+ set to 6 x 6 negative size, developed in PMK Pyro, Printed on silverproof paper, developed in Ilford warmtone developer.

Monday 15 February 2021

Reciprocity How it may affect monochrome film


The use of a Zero pinhole camera means that long exposures are the norm.
It might be a good idea to give an insight into how reciprocity affects the negatives. It is a wide-ranging subject that afflicts colour and black and white materials in different ways at long exposures, extremely short exposures and with flash. Because of this I am limiting this post to long exposure times with black and white film.

The Law:

The formula E=IxT expresses reciprocal relationship between the intensity of light reaching the film and the time allowed to act on the film. If one increases the other decreases proportionally, no net change in exposure occurs.

Ansel Adams The Negative.

At long exposures this law breaks down, known as reciprocity failure. It is where a seconds worth of light is not enough to satisfactorily produce the required densities in the negative. So the longer the exposure the greater the compensation needs to be. With these exaggerated times comes a side effect in that the lower values recorded become under exposed more than the higher ones causing the contrast of the negative to increase. You can make adjustment for this when developing the film by a reduction of ten percent for up to ten seconds, from ten seconds by twenty percent and from a hundred seconds by thirty percent. These changes are easy to control for single frame exposure made with large format cameras but a little difficult to achieve with roll film. If all the frames on the film are exposed for no longer than ten seconds then the ten percent reduction will control the increase in contrast across the whole film, but in practice this is not always the case with exposure times being all over the place. I would suggest that a reduction of ten percent be the starting point and that with experimentation will find what works best for you. Having said all this the side effect of higher contrast maybe to your liking in which case where's the problem.


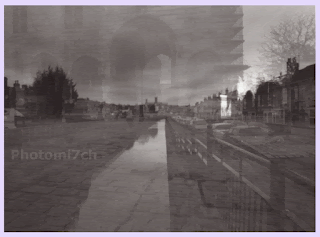
The picture included in this post shows a slight increase in contrast. The negatives Ilford FP4+ were processed in PMK Pyro without an adjustment for increased contrast. Printed on grade two multi grade paper developed using Moersch 6 blue.


The following images and those above were all made using a Zero multi format Pinhole camera. The pictures below are from negatives using Fomapan 100 at box speed developed in studional for 11 minutes. scanned from photographs printed on Ilford multigrade 4 developed in souped ilford multigrade. 


Wednesday 15 April 2020

Camera candy, Agfa Isolette

This is for all those who delight in the design and form of the light box. This one has some wonderful lines. I shell put it down nice and easy, so you can Savor its lines.

Sunday 9 September 2018

Delta 100 and the lens-less camera


This is not the first time I have mentioned sharpness when it comes to pinhole photography. I know! not something you associate with the dream like quality of the images it produces. It is part of the reason that draws me to using a pinhole camera but it does not stop me speculating whether a T grain film would enhance the detail and therefore increase the sharpness.


I have already informally checked out the idea that Rodinal/RO9 could go some way to increasing sharpness which was done some time ago. (if your interested in that article I'll post a link at the end) The results did confirm that there was something in my observations. I will reiterate that the sharpness increase will not rival that of a lensed camera.


Delta 100 @100iso developed in RO9
 I did find that PMK Pyro developed negatives, when printed looked softer to the pictures produced from negatives processed in Rodinal/RO9 in a very subtle way. This then lead me on to thinking would T grain film with it's enhanced sharpness show a difference when used with a pinhole camera. Better still would it get a double boost when combined with Rodinal/RO9 developer?

 
Contact print on Fotospeed RCVC
So is there a difference? Yes a  noticeable one it has surprised me the level of increase. I'm not sure how much is down to the film alone because the film was developed in Rodinal/RO9. I suspect that most of it is from the films T grain and the developer has just enhanced the equation. 


What do I mean by an increase of sharpness - it shows it's self with a better defining of the details across all areas but still maintains that softness you expect from lens-less images. 


All the above were printed on Fotospeed RCVC paper developed in Ilford multigrade 

Link to older post on sharpness